12.2 集成Spring Security
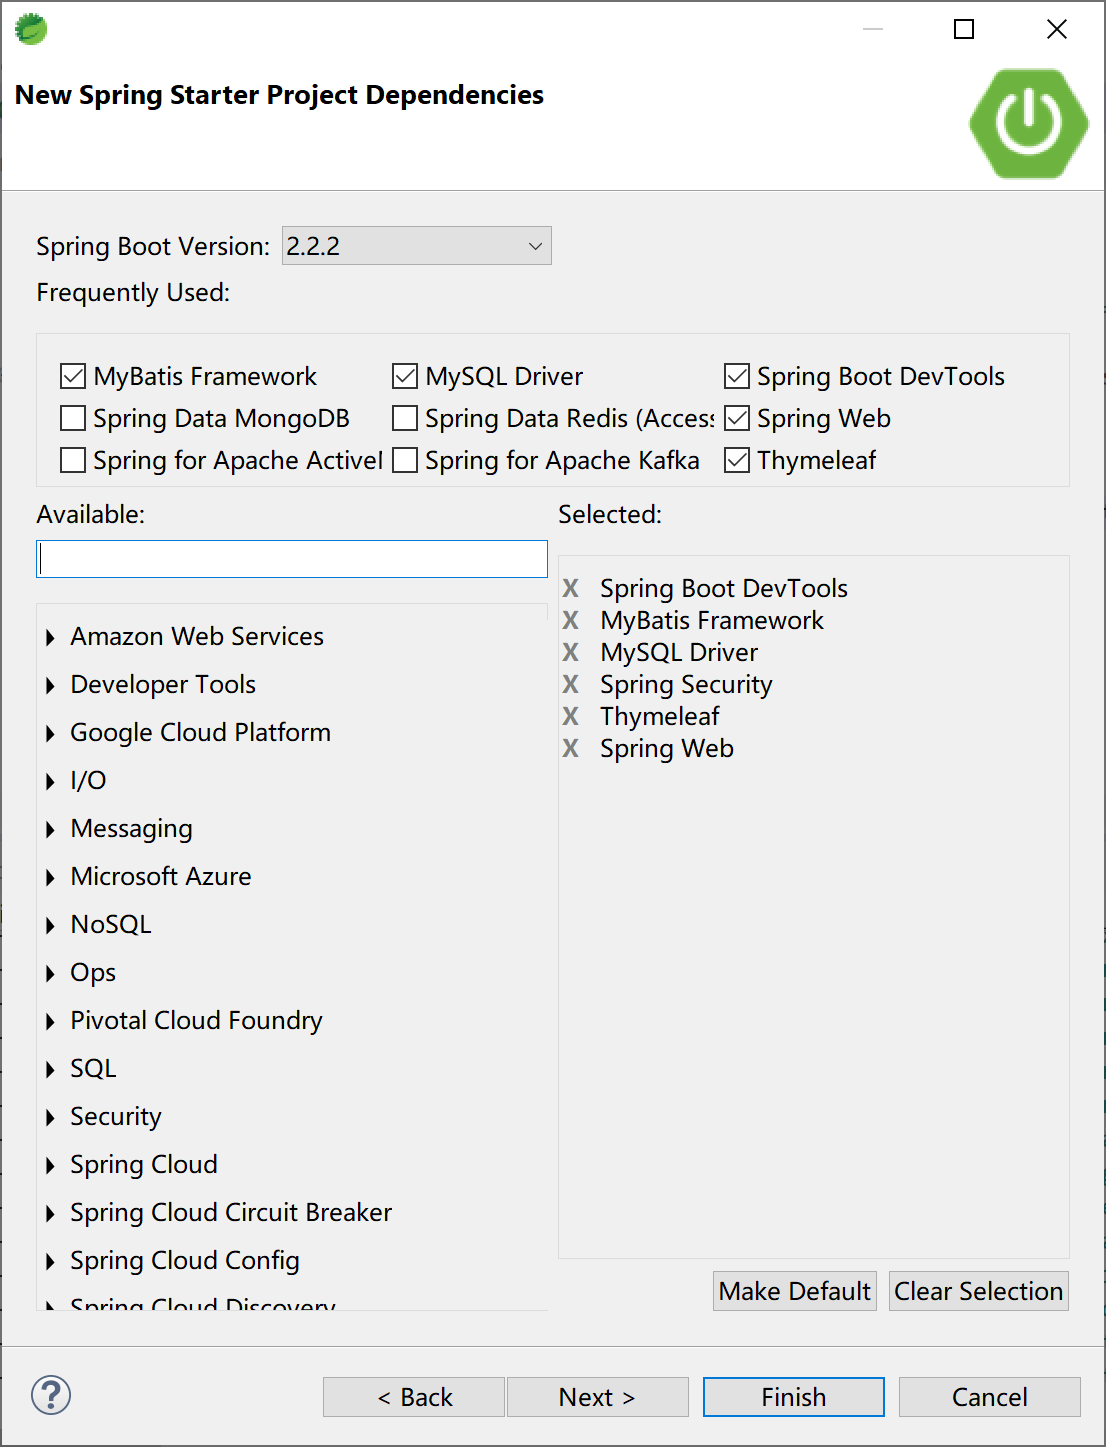
在Spring Boot中集成Spring Security一如既往地使用了启动器依赖,在创建Spring Starter项目时选中“Spring Security”依赖即可。
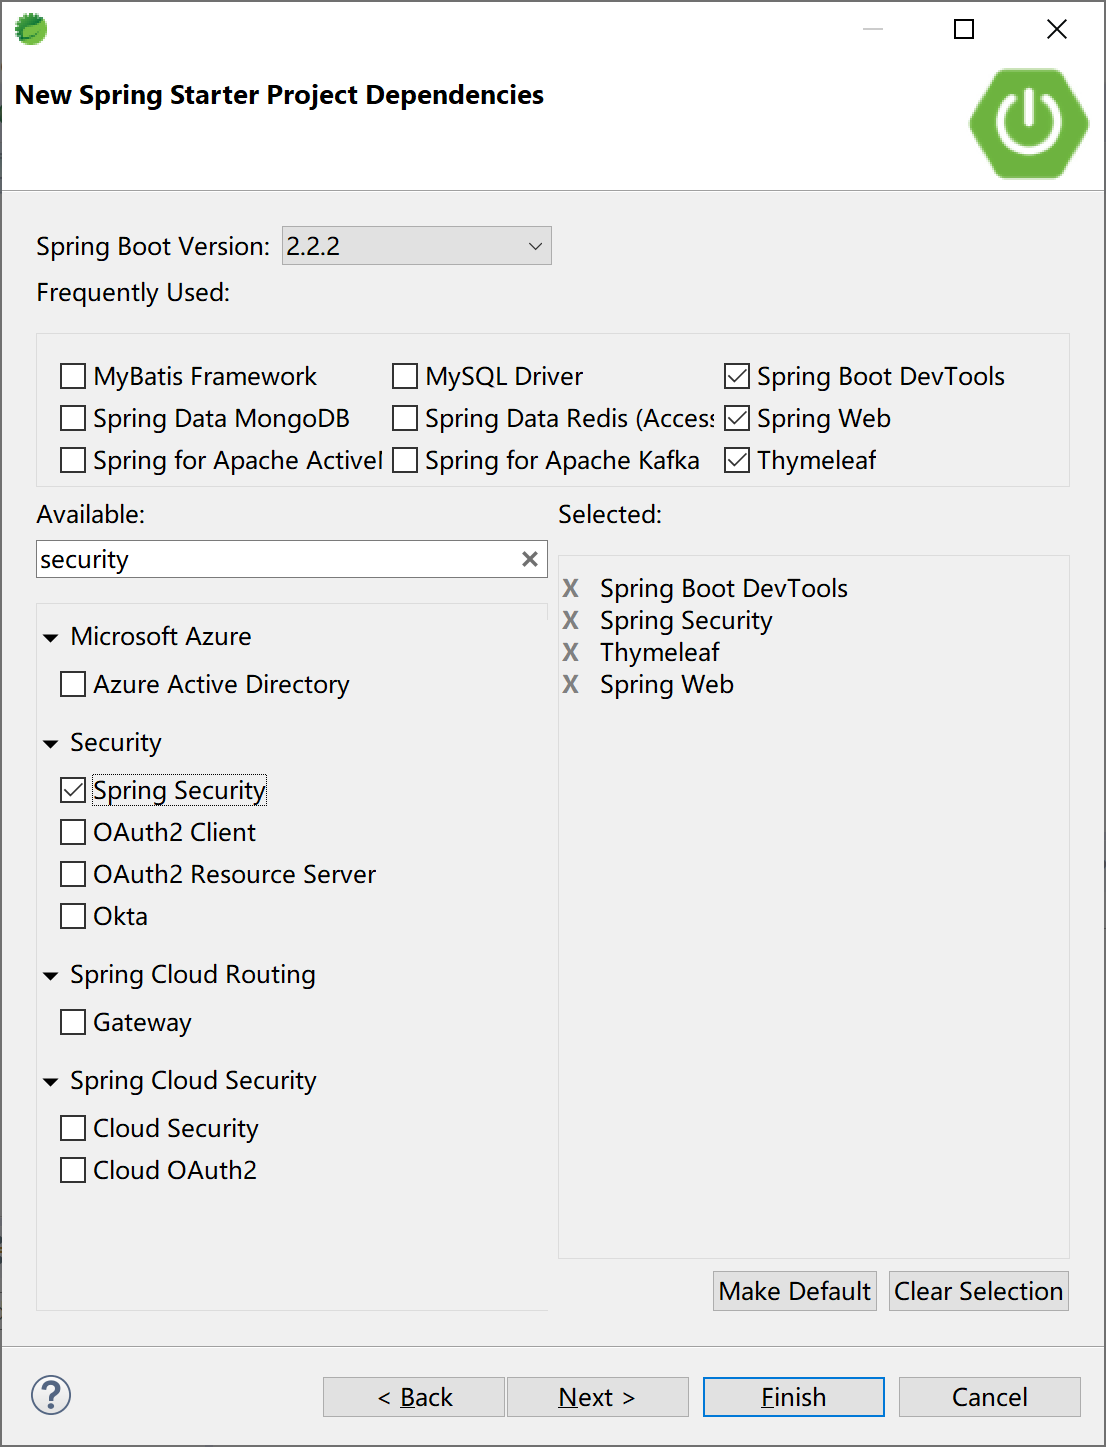
12.2.1 基本集成
添加“Spring Security”启动器依赖后,即完成了Spring Security,项目的pom文件中的依赖为:
<dependency>
    <groupId>org.springframework.boot</groupId>
    <artifactId>spring-boot-starter-security</artifactId>
</dependency>
在项目中添加一个控制器HelloController类,测试Spring Security是否正确工作。
package com.example.security.controller;

import org.springframework.web.bind.annotation.RequestMapping;
import org.springframework.web.bind.annotation.RestController;

@RestController
@RequestMapping("/security/")
public class HelloController {

    @RequestMapping("/hello")
    public String hello() {
        return "Hello, Security.";
    }

}
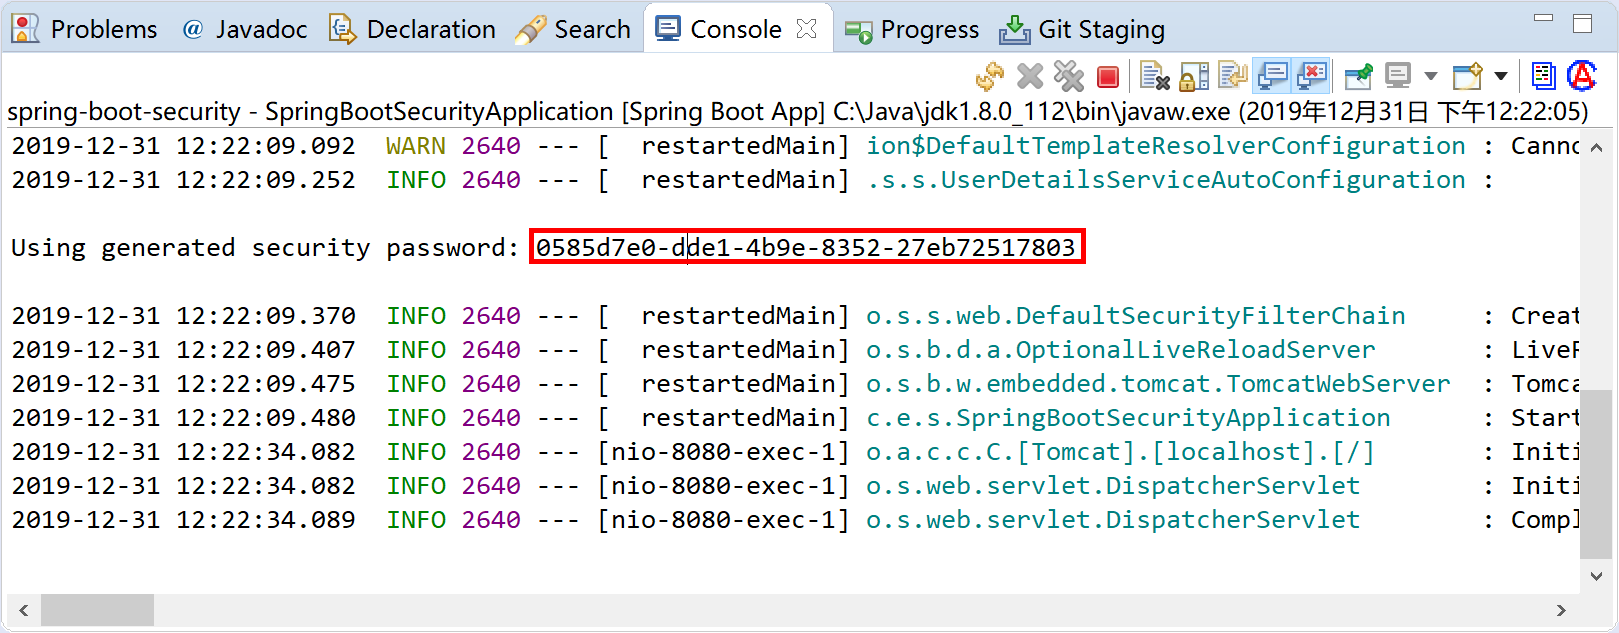
运行应用后,打开浏览器,访问http://localhost:8080/security/hello,弹出Spring Security提供的默认认证页面,用户名为user,密码是在启动应用时生成的一个随机字符串(STS控制台中的密码信息:Using generated security password: 0585d7e0-dde1-4b9e-8352-27eb72517803)。

默认密码在应用启动时,打印在控制台中,当然每次启动时生成的密码都不一样。
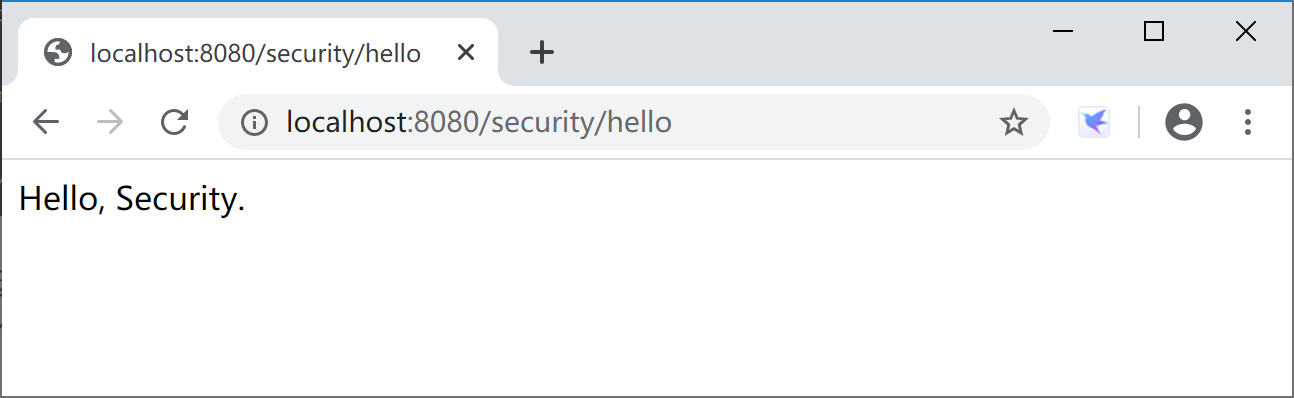
使用user用户名和生成的密码(这里是“0585d7e0-dde1-4b9e-8352-27eb72517803”)登录后,可正确访问HelloController返回的信息。
通过查看Spring Security的源码org.springframework.boot.autoconfigure.security.servlet.UserDetailsServiceAutoConfiguration类,可以看到inMemoryUserDetailsManager方法中使用的SecurityProperties.User user属性提供了用户名和密码。由getOrDeducePassword方法通过日志logger.info(String.format("%n%nUsing generated security password: %s%n", user.getPassword()));将生成的默认密码打印到控制台。
public InMemoryUserDetailsManager inMemoryUserDetailsManager(SecurityProperties properties,
                                                             ObjectProvider<PasswordEncoder> passwordEncoder) {
    SecurityProperties.User user = properties.getUser();
    List<String> roles = user.getRoles();
    return new InMemoryUserDetailsManager(
        User.withUsername(user.getName()).password(getOrDeducePassword(user, passwordEncoder.getIfAvailable()))
        .roles(StringUtils.toStringArray(roles)).build());
}
进一步查看这个User类,可以看到默认登录用户为user,密码为一个uuid字符串。
public static class User {

    /**
         * Default user name.
         */
    private String name = "user";

    /**
         * Password for the default user name.
         */
    private String password = UUID.randomUUID().toString();

    /**
         * Granted roles for the default user name.
         */
    private List<String> roles = new ArrayList<>();

    private boolean passwordGenerated = true;

    public String getName() {
        return this.name;
    }

    public void setName(String name) {
        this.name = name;
    }

    public String getPassword() {
        return this.password;
    }

    public void setPassword(String password) {
        if (!StringUtils.hasLength(password)) {
            return;
        }
        this.passwordGenerated = false;
        this.password = password;
    }

    public List<String> getRoles() {
        return this.roles;
    }

    public void setRoles(List<String> roles) {
        this.roles = new ArrayList<>(roles);
    }

    public boolean isPasswordGenerated() {
        return this.passwordGenerated;
    }

}
如果我们简单的在application.properties文件中指定用户名和密码:
spring.security.user.name=kevin
spring.security.user.password=6998
spring.security.user.roles=admin
则应用在启动时,就不会生成随机的uuid密码,也不会在控制台中打印Using generated security password: 0585d7e0-dde1-4b9e-8352-27eb72517803这样的信息了。
这个时候,通过浏览器访问http://localhost:8080/security/hello则需要输入kevin用户和6998密码,就可以正常访问后台业务逻辑并返回正确的结果,并且该用户具有admin角色(虽然这个示例中角色没有任何用处)。
12.2.2 密码加密
除了在学习环境下,为了安全起见,密码存储都必须要加密。
Spring Security通过实现PasswordEncoder接口,提供了众多的密码加密类(包括供我们在学习环境下使用的NoOpPasswordEncoder明文密码编码器),供我们在实际工作中根据需要选用。

奇葩的NoOpPasswordEncoder类:encode(CharSequence rawPassword) 方法的返回值为encode(CharSequence rawPassword) ,也就是密码编码返回明文,所以千万不要在生产环境中使用。
修改SecurityConfiguration类,添加BCryptPasswordEncoder密码编码器。
BCryptPasswordEncoder,使用了BCrypt强哈希方法来加密密码。
package com.example.security.config;

import org.springframework.context.annotation.Bean;
import org.springframework.context.annotation.Configuration;
import org.springframework.security.config.annotation.authentication.builders.AuthenticationManagerBuilder;
import org.springframework.security.config.annotation.web.builders.HttpSecurity;
import org.springframework.security.config.annotation.web.configuration.EnableWebSecurity;
import org.springframework.security.config.annotation.web.configuration.WebSecurityConfigurerAdapter;
import org.springframework.security.crypto.bcrypt.BCryptPasswordEncoder;
import org.springframework.security.crypto.password.PasswordEncoder;

@Configuration
@EnableWebSecurity
public class SecurityConfiguration extends WebSecurityConfigurerAdapter {
    @Bean
    PasswordEncoder passwordEncoder() {
        PasswordEncoder encoder = new BCryptPasswordEncoder();
        return encoder;
    }

    @Override
    protected void configure(AuthenticationManagerBuilder auth) throws Exception {
        auth.inMemoryAuthentication()
        .withUser("admin").password(new BCryptPasswordEncoder().encode("admin")).roles("ADMIN", "USER")
        .and()
        .withUser("kevin").password(new BCryptPasswordEncoder().encode("6998")).roles("USER")
        .and()
        .withUser("roy").password(new BCryptPasswordEncoder().encode("3525")).roles("USER");
    }

    @Override
    protected void configure(HttpSecurity http) throws Exception {
        http.authorizeRequests()
        .antMatchers("/admin/**")
        .hasRole("ADMIN")
        .antMatchers("/user/**")
        .hasRole("USER")
        .anyRequest()
        .authenticated()
        .and()
        .formLogin()
        .loginProcessingUrl("/login")
        .permitAll();
    }

}
上面的示例中PasswordEncoder使用了BCryptPasswordEncoder实现类,并且在基于内存的认证器中给出用户密码时,使用了BCryptPasswordEncoder加密密码(password(new BCryptPasswordEncoder().encode("admin")))。这样,内存中存储的密码时通过BCrypt加密的密码,用户在登录页面输入密码(例如admin用户的密码admin)后,Spring Security使用PasswordEncoder对密码进行编码后与内存中存储的加密后的密码对比,完成认证,正确后就放行。
12.2.3 基于内存的认证
在本小节的学习过程中,通过将用户、密码和角色配置在内存中,会更方便集中精力学习Spring Security。
注释掉上一小节application.properties文件中指定的用户名、密码和角色。
后续小节我们会通过数据库来完成一个RBAC的安全控制示例。
package com.example.security.config;

import org.springframework.context.annotation.Bean;
import org.springframework.context.annotation.Configuration;
import org.springframework.security.config.annotation.authentication.builders.AuthenticationManagerBuilder;
import org.springframework.security.config.annotation.web.builders.HttpSecurity;
import org.springframework.security.config.annotation.web.configuration.EnableWebSecurity;
import org.springframework.security.config.annotation.web.configuration.WebSecurityConfigurerAdapter;
import org.springframework.security.crypto.password.NoOpPasswordEncoder;
import org.springframework.security.crypto.password.PasswordEncoder;

@Configuration
@EnableWebSecurity
public class SecurityConfiguration extends WebSecurityConfigurerAdapter {
    @Bean
    PasswordEncoder passwordEncoder() {
        return NoOpPasswordEncoder.getInstance();
    }

    @Override
    protected void configure(AuthenticationManagerBuilder auth) throws Exception {
        auth.inMemoryAuthentication()
            .withUser("admin").password("admin").roles("ADMIN", "USER")
        .and()
            .withUser("kevin").password("6998").roles("USER")
        .and()
            .withUser("roy").password("3525").roles("USER");
    }

    @Override
    protected void configure(HttpSecurity http) throws Exception {
        http.authorizeRequests()
            .antMatchers("/admin/**")
            .hasRole("ADMIN")
            .antMatchers("/user/**")
            .hasRole("USER")
            .anyRequest()
            .authenticated()
        .and()
            .formLogin()
            .loginProcessingUrl("/login")
            .permitAll();
    }

}
上述代码,首先注册一个PasswordEncoder(密码加密编码器类),这里为了测试简便,使用了不加密密码。在实际生产环境下绝对不能使用这个密码编码器类。
然后使用AuthenticationManagerBuilder.inMemoryAuthentication的内存认证,通过编码添加了3个用户和对应的角色("ADMIN", "USER")。
最后使用HttpSecurity为不同的资源匹配了不同的角色访问权限。
添加AdminController控制器类,提供“/admin/hello”资源。
package com.example.security.controller;

import org.springframework.web.bind.annotation.RequestMapping;
import org.springframework.web.bind.annotation.RestController;

@RestController
@RequestMapping("/admin/")
public class AdminController {

    @RequestMapping("/hello")
    public String hello() {
        return "admin.hello";
    }

}
添加UserController控制器类,提供“/user/hello”资源。
package com.example.security.controller;

import org.springframework.web.bind.annotation.RequestMapping;
import org.springframework.web.bind.annotation.RestController;

@RestController
@RequestMapping("/user/")
public class UserController {

    @RequestMapping("/hello")
    public String hello() {
        return "user.hello";
    }

}
启动应用,测试:
使用admin用户登录,可以正确访问“/admin/hello”和“/user/hello”资源。
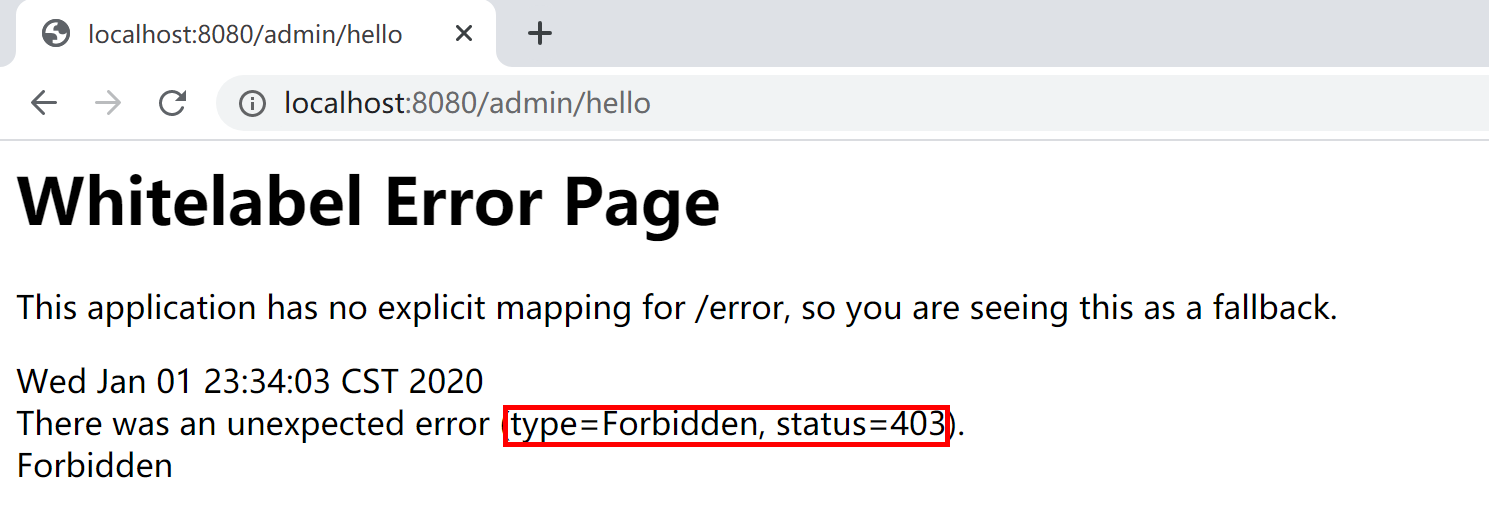
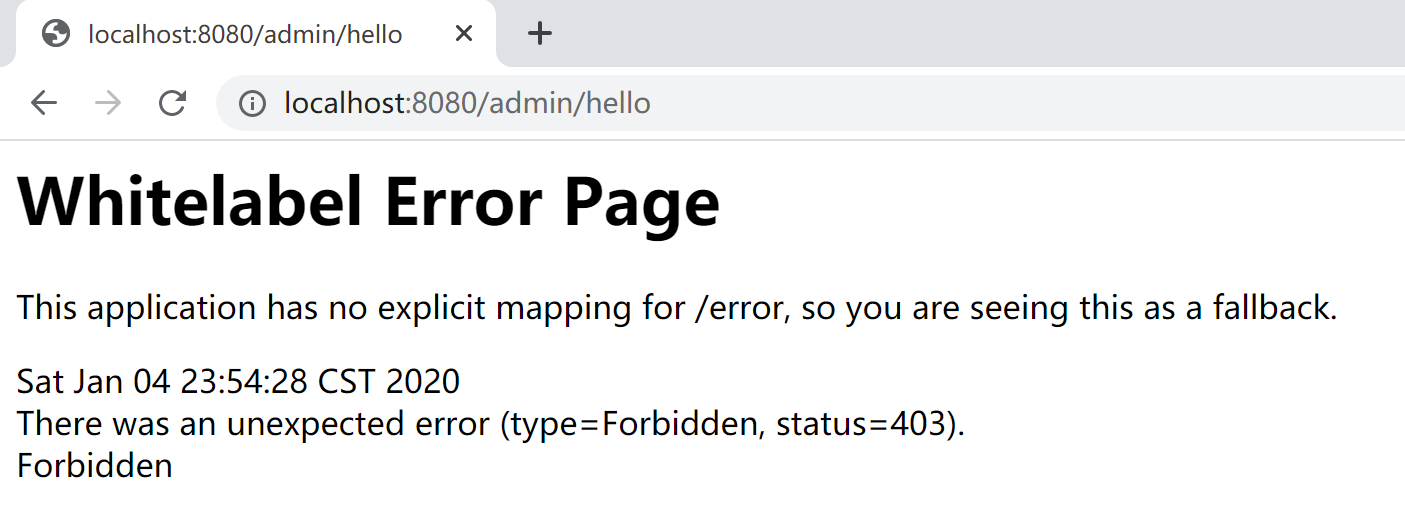
使用kevin用户登录,可以正确访问“/user/hello”资源,不能正确访问“/admin/hello”资源,错误信息如下:
以上就是一个基于内存认证的最简单的RBAC(基于角色的存取控制)权限控制系统:
- kevin拥有USER角色;
- “/user/**”资源授权给USER角色;
- kevin登录后拥有USER角色,可以访问“/user/hello”资源。
12.2.4 登录表单/注销配置
虽然Spring Security提供了默认的登录表单,但是在实际工作中绝大多数情况都用不上。基本上在所有的项目/产品中,都会使用自定义的登录表单。当然,注销登录(或者叫做登出),也会使用自定义的配置。
通过查看Spring Security源码,可以看到默认登录表单在org.springframework.security.web.authentication.ui.DefaultLoginPageGeneratingFilter.generateLoginPageHtml方法中构建。
在DefaultLoginPageGeneratingFilter类的doFilter方法中response.getWriter().write(loginPageHtml)代码向浏览器输出登录表单。
public void doFilter(ServletRequest req, ServletResponse res, FilterChain chain)
    throws IOException, ServletException {
    HttpServletRequest request = (HttpServletRequest) req;
    HttpServletResponse response = (HttpServletResponse) res;

    boolean loginError = isErrorPage(request);
    boolean logoutSuccess = isLogoutSuccess(request);
    if (isLoginUrlRequest(request) || loginError || logoutSuccess) {
        String loginPageHtml = generateLoginPageHtml(request, loginError,
                                                     logoutSuccess);
        response.setContentType("text/html;charset=UTF-8");
        response.setContentLength(loginPageHtml.getBytes(StandardCharsets.UTF_8).length);
        response.getWriter().write(loginPageHtml);

        return;
    }

    chain.doFilter(request, response);
}
本小节,我们使用Thymeleaf模板+基于内存认证方式来学习如何自定义登录表单。
首先,我们添加几个简单的页面,然后通过Spring Security基于内存的配置设置其用户、角色、自定义登录表单、注销等操作。
12.2.4.1 首页
创建src/main/resources/templates/index.html页面,作为项目的首页。
<!DOCTYPE html>
<html xmlns:th="http://www.thymeleaf.org">
<head>
<title>示例首页</title>
</head>
<body>
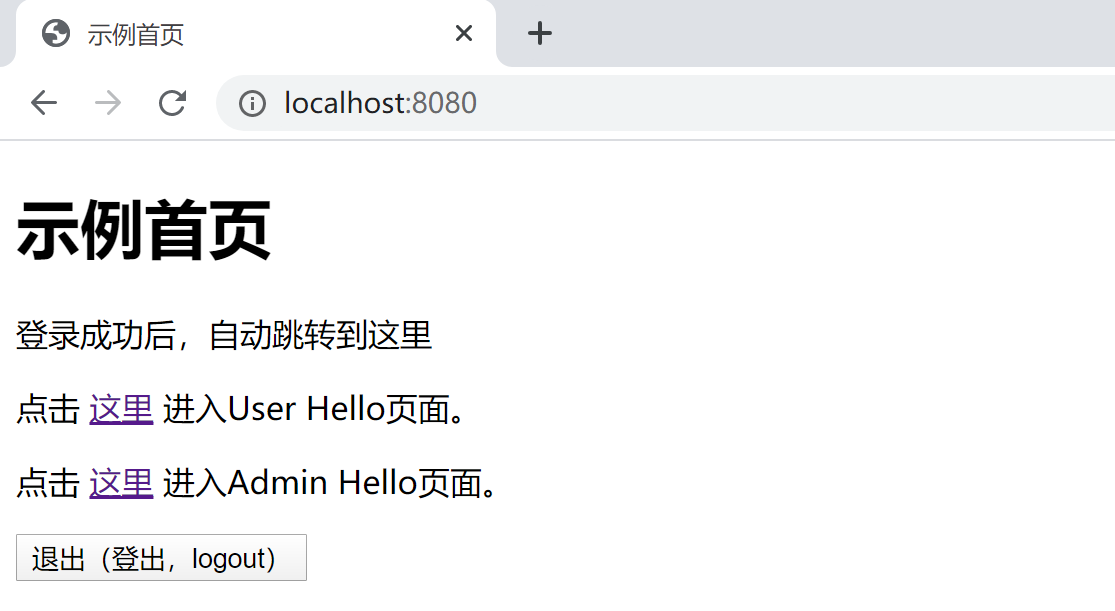
<h1>示例首页</h1>
<p>登录成功后,自动跳转到这里</p>
<p>
点击 <a th:href="@{/user/hello}">这里</a> 进入User Hello页面。
</p>
<p>
点击 <a th:href="@{/admin/hello}">这里</a> 进入Admin Hello页面。
</p>
<form th:action="@{/logout}" method="post">
<input type="submit" value="退出(登出,logout)" />
</form>
</body>
</html>
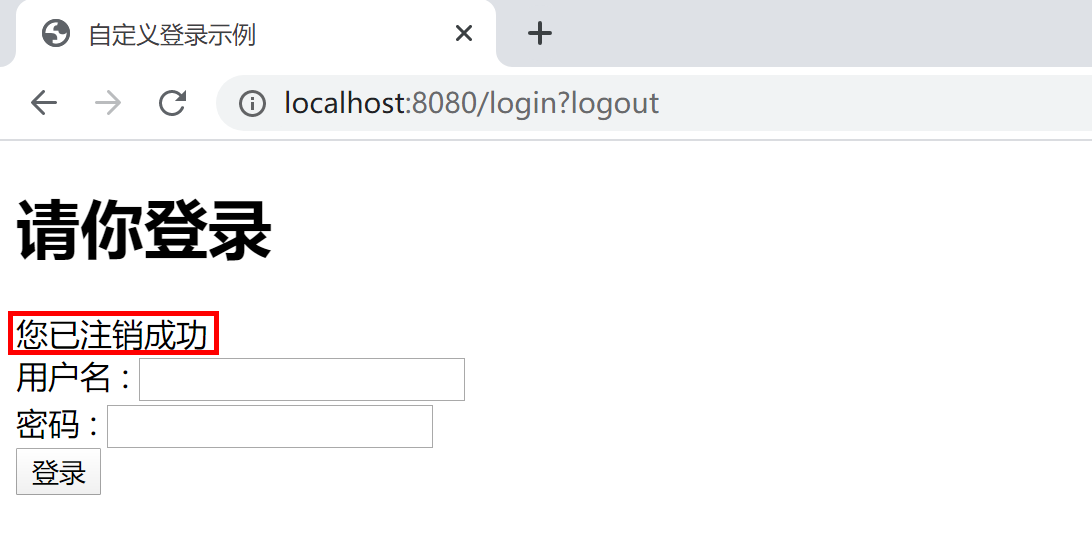
12.2.4.2 登录页面
创建src/main/resources/templates/login.html页面,作为项目的登录页面。
<!DOCTYPE html>
<html xmlns:th="http://www.thymeleaf.org">
<head>
<title>自定义登录示例</title>
</head>
<body>
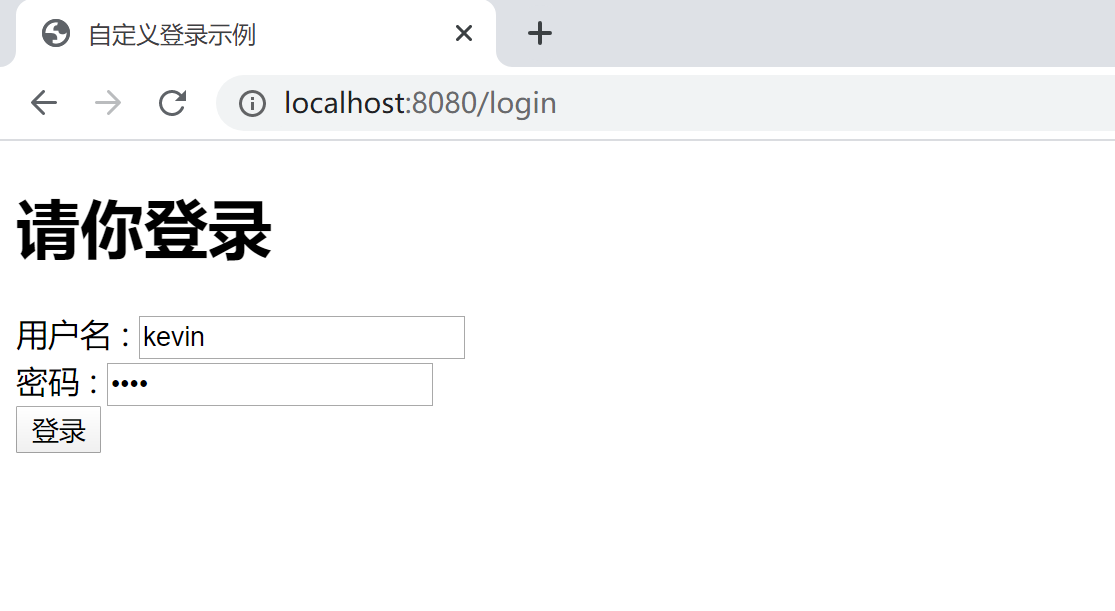
<h1>请你登录</h1>
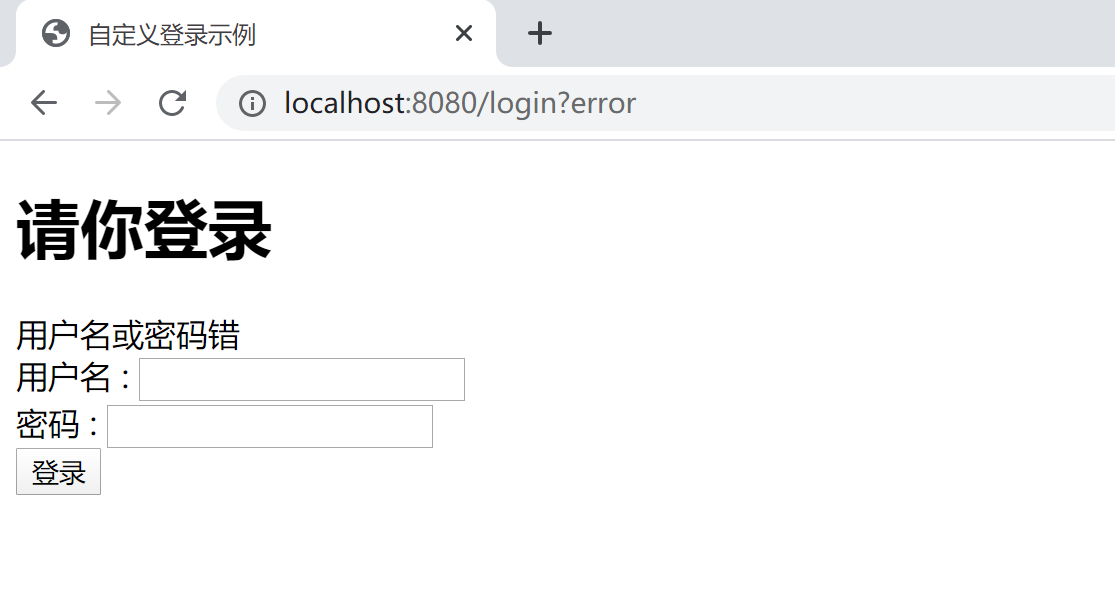
<div th:if="${param.error}">用户名或密码错</div>
<div th:if="${param.logout}">您已注销成功</div>
<form th:action="@{/login}" method="post">
<div>
<label> 用户名 : <input type="text" name="login_username" />
</label>
</div>
<div>
<label> 密码 : <input type="password" name="login_password" />
</label>
</div>
<div>
<input type="submit" value="登录" />
</div>
</form>
</body>
</html>
在登录页面中,特意将用户名input设为login_username,演示匹配后续的自定义登录页面配置信息。
12.2.4.3 管理页面
创建src/main/resources/templates/admin/hello.html,作为项目的管理页面,按照本示例设置,需要ADMIN角色的用户才可以访问。
<!DOCTYPE html>
<html xmlns:th="http://www.thymeleaf.org">
<head>
<title>Admin.Hello Page</title>
</head>
<body>
    <h1>Admin Page</h1>
    <p th:text="${user}"/>
    <p><a th:href="@{/index}">返回</a></p>
</body>
</html>
12.2.4.4 用户页面
创建src/main/resources/templates/user/hello.html,作为项目的用户页面,按照本示例设置,需要USER角色的用户才可以访问。
<!DOCTYPE html>
<html xmlns:th="http://www.thymeleaf.org">
<head>
<title>User.Hello Page</title>
</head>
<body>
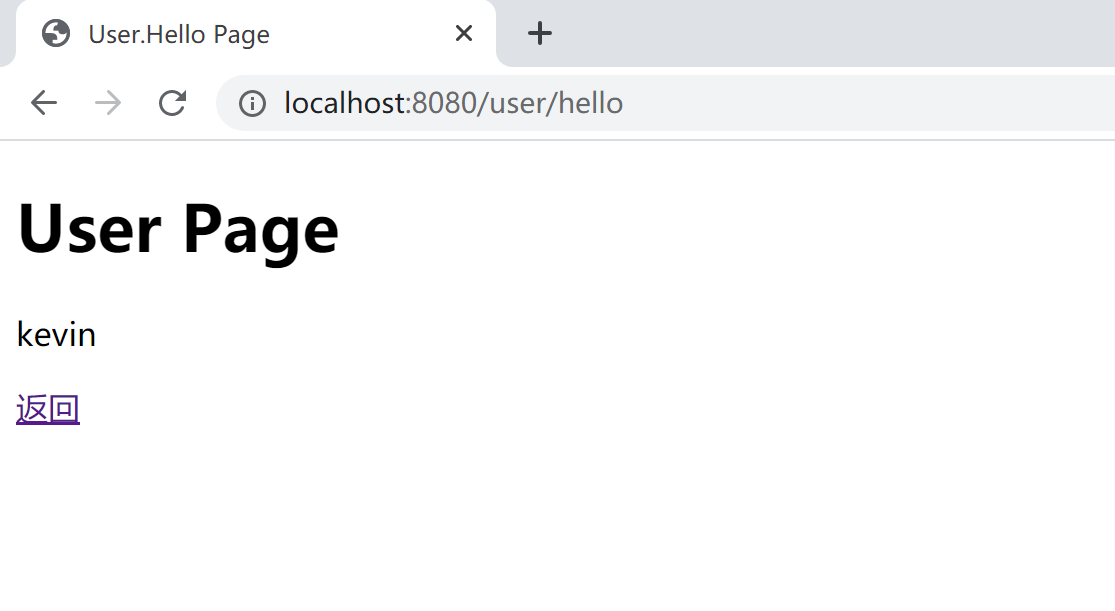
<h1>User Page</h1>
<p><p th:text="${user}"/></p>
<p><a th:href="@{/index}">返回</a></p>
</body>
</html>
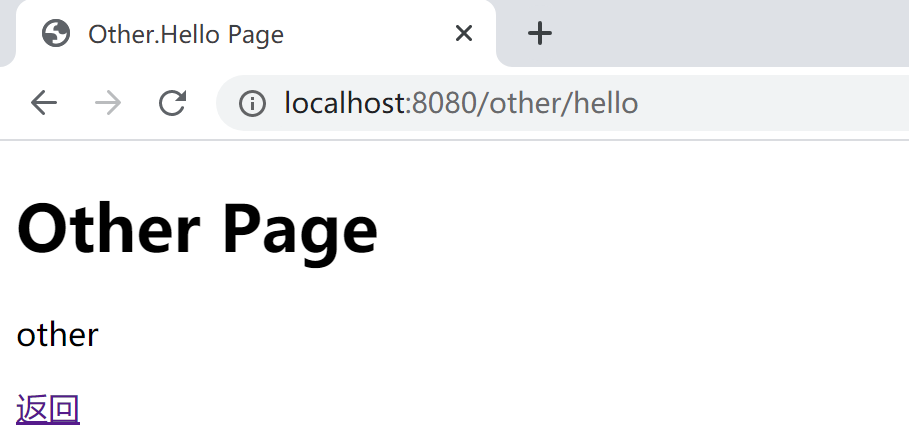
12.2.4.5 其他页面
创建src/main/resources/templates/other/hello.html,作为项目的其他页面,按照本示例设置,任何登录用户(任何角色)都可以访问。
<!DOCTYPE html>
<html xmlns:th="http://www.thymeleaf.org">
<head>
<title>Other.Hello Page</title>
</head>
<body>
    <h1>Other Page</h1>
    <p><p th:text="${user}"/></p>
    <p><a th:href="@{/index}">返回</a></p>
</body>
</html>
12.2.4.6 页面Controller
新建一个控制页面跳转的PageController,将上述4个页面串接起来。
package com.example.security.controller;

import org.springframework.stereotype.Controller;
import org.springframework.web.bind.annotation.RequestMapping;
import org.springframework.web.bind.annotation.RequestMethod;
import org.springframework.web.servlet.ModelAndView;

@Controller
public class PagesController {

    @RequestMapping("/index")
    public String index() {
        return "/index";
    }

    @RequestMapping(value = "/login", method = RequestMethod.GET)
    public String login() {
        return "/login";
    }

    @RequestMapping("/admin/hello")
    public ModelAndView adminHello() {
        ModelAndView mv = new ModelAndView();
        mv.addObject("user", "admin");
        mv.setViewName("/admin/hello");
        return mv;
    }

    @RequestMapping("/user/hello")
    public ModelAndView userHello() {
        ModelAndView mv = new ModelAndView();
        mv.addObject("user", "kevin");
        mv.setViewName("/user/hello");
        return mv;
    }

    @RequestMapping("/other/hello")
    public ModelAndView otherHello() {
        ModelAndView mv = new ModelAndView();
        mv.addObject("user", "other");
        mv.setViewName("/other/hello");
        return mv;
    }

}
12.2.4.7 Spring Security配置
在启用了Spring Security的Spring Boot应用中,我们可以通过自定义表单html页面,然后通过HttpSecurity的formLogin和logout自定义登录页面和注销(登出)操作和行为。
package com.example.security.config;

import org.springframework.context.annotation.Configuration;
import org.springframework.security.config.annotation.authentication.builders.AuthenticationManagerBuilder;
import org.springframework.security.config.annotation.web.builders.HttpSecurity;
import org.springframework.security.config.annotation.web.builders.WebSecurity;
import org.springframework.security.config.annotation.web.configuration.EnableWebSecurity;
import org.springframework.security.config.annotation.web.configuration.WebSecurityConfigurerAdapter;
import org.springframework.security.crypto.bcrypt.BCryptPasswordEncoder;

@Configuration
@EnableWebSecurity
public class SecurityConfiguration extends WebSecurityConfigurerAdapter {

    @Override
    protected void configure(AuthenticationManagerBuilder auth) throws Exception {
        auth.inMemoryAuthentication()
        .passwordEncoder(new BCryptPasswordEncoder())
        .withUser("admin").password(new BCryptPasswordEncoder().encode("admin")).roles("ADMIN", "USER")
        .and()
        .withUser("kevin").password(new BCryptPasswordEncoder().encode("6998")).roles("USER")
        .and()
        .withUser("roy").password(new BCryptPasswordEncoder().encode("3525")).roles("OTHER");
    }

    @Override
    protected void configure(HttpSecurity http) throws Exception {
        http.formLogin()
            .loginPage("/login")
            .usernameParameter("login_username")
            .passwordParameter("login_password")
            .failureUrl("/login?error")
            .defaultSuccessUrl("/index")
            .permitAll()
        .and().logout()
            .logoutUrl("/logout")
            .logoutSuccessUrl("/login?logout")
            .clearAuthentication(true)
            .invalidateHttpSession(true)
            .permitAll()
        .and().authorizeRequests()
            .antMatchers("/admin/**").hasRole("ADMIN")
            .antMatchers("/user/**").hasRole("USER")
            .anyRequest()
            .authenticated();
    }

    @Override
    public void configure(WebSecurity web) {
        web.ignoring().antMatchers("/config/**", "/css/**", "/images/**", "/js/**");
    }

}
formLogin().permitAll()代码指示Spring Security允许任何用户访问formLogin与之关联的URL(/login);logout().permitAll()代码指示Spring Security允许任何用户访问logout与之关联的URL(/logout);authorizeRequests().anyRequest().authenticated()代码指示Spring Security允许登录(通过认证的)用户访问所有的页面(比如“other/hello.html”页面);antMatchers("/admin/**").hasRole("ADMIN")具有ADMIN角色的登录用户才都访问/admin/开头的页面。
12.2.4.8 测试
启动应用程序,打开浏览器,输出http://localhost:8080/地址,自动跳转到登录页面。
输入错误的用户名,会跳转回登录页面,并且显示错误信息:用户名或密码错。
输入正确的用户名和密码,登录后会跳转到首页。
点击User Hello页面的链接,可以正确访问User Hello页面。
返回首页,后点击Admin Hello页面的链接,由于Kevin用户不具有ADMIN角色,所以不可以访问Admin Hello页面。
使用roy用户登录(其用户角色为OTHER),既不能访问admin/hello页面,也不能访问user/hello页面,只能访问other/hello页面。当然,admin和kevin用户登录,都可以访问other/hello页面。
在首页,点击退出(登出,logout)按钮,可以正确注销当前登录。
以上测试,符合项目权限控制预期。
本小节示例项目代码:
https://github.com/gyzhang/SpringBootCourseCode/tree/master/spring-boot-security
12.2.5 基于数据库的认证
在我们实际的工作中,几乎所有的认证授权,都是基于数据库中存储的用户授权数据来的完成的。
在Spring Security中,通过org.springframework.security.core.userdetails.UserDetailsl和org.springframework.security.core.userdetails.UserDetailsService两个接口完成程序定义(在这两个接口的实现类中访问数据库中的数据)的用户服务,然后通过AuthenticationManagerBuilder.userDetailsService(customUserService())将我们通过数据库存储的用户角色(授权)连接到Spring Security,完成用户认证与授权(Authentication和Authorization)。
@Bean
UserDetailsService customUserService() { // 注册UserDetailsService 的bean
    return new CustomUserDetailsService();
}
@Bean
PasswordEncoder passwordEncoder() {
    PasswordEncoder encoder = new BCryptPasswordEncoder();
    return encoder;
}

@Override
public void configure(AuthenticationManagerBuilder auth) throws Exception {
    auth.userDetailsService(customUserService()).passwordEncoder(passwordEncoder());
}
本小节,我们使用MySQL数据库,通过MyBatis来学习如何基于数据库来支持Spring Security的用户认证。
创建项目,添加数据库及Spring Security相关的启动器依赖。
项目的pom依赖为:
<dependency>
    <groupId>org.springframework.boot</groupId>
    <artifactId>spring-boot-starter-security</artifactId>
</dependency>
<dependency>
    <groupId>org.springframework.boot</groupId>
    <artifactId>spring-boot-starter-thymeleaf</artifactId>
</dependency>
<dependency>
    <groupId>org.springframework.boot</groupId>
    <artifactId>spring-boot-starter-web</artifactId>
</dependency>
<dependency>
    <groupId>org.mybatis.spring.boot</groupId>
    <artifactId>mybatis-spring-boot-starter</artifactId>
    <version>2.1.1</version>
</dependency>

<dependency>
    <groupId>org.springframework.boot</groupId>
    <artifactId>spring-boot-devtools</artifactId>
    <scope>runtime</scope>
    <optional>true</optional>
</dependency>
<dependency>
    <groupId>mysql</groupId>
    <artifactId>mysql-connector-java</artifactId>
    <scope>runtime</scope>
</dependency>
项目的application.yml文件中配置数据库连接及MyBatis属性。
# mysql数据源配置
spring:
  datasource:
    url: jdbc:mysql://localhost:3306/ssdemo?useUnicode=true&characterEncoding=utf-8&serverTimezone=GMT%2B8
    username: root
    password: 123456
    driver-class-name: com.mysql.cj.jdbc.Driver
# mybatis 配置信息
mybatis:
  mapper-locations: classpath:mapping/*Mapper.xml
  type-aliases-package: com.example.security.db.entity
  configuration:
    map-underscore-to-camel-case: true
mybatis.configuration.map-underscore-to-camel-case=true是打开字段下划线和java实体类中属性“驼峰命名”之间的映射。例如role_code字段自动映射为roleCode,反之亦然。
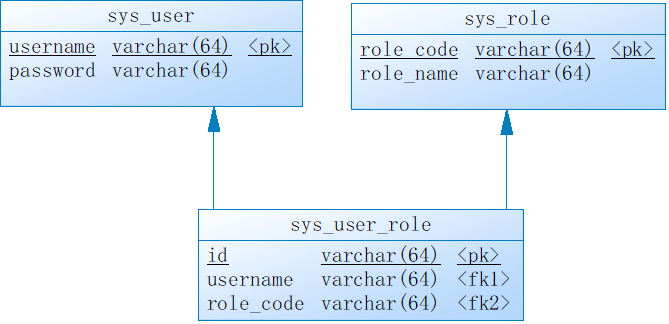
12.2.5.1 创建数据库表
基于最简学习案例原则,设计的数据库表(用户、角色和用户角色关联表)只包含最少的字段。
drop table if exists sys_role;

drop table if exists sys_user;

drop table if exists sys_user_role;

/*==============================================================*/
/* Table: sys_role                                              */
/*==============================================================*/
create table sys_role
(
   role_code            varchar(64) not null,
   role_name            varchar(64),
   primary key (role_code)
);

/*==============================================================*/
/* Table: sys_user                                              */
/*==============================================================*/
create table sys_user
(
   username             varchar(64) not null,
   password             varchar(64),
   primary key (username)
);

/*==============================================================*/
/* Table: sys_user_role                                         */
/*==============================================================*/
create table sys_user_role
(
   id                   varchar(64) not null,
   username             varchar(64),
   role_code            varchar(64),
   primary key (id)
);

alter table sys_user_role add constraint FK_Reference_1 foreign key (username)
      references sys_user (username) on delete restrict on update restrict;

alter table sys_user_role add constraint FK_Reference_2 foreign key (role_code)
      references sys_role (role_code) on delete restrict on update restrict;
在3张表中插入一些测试数据。
INSERT INTO `sys_user` VALUES ('admin', 'admin');
INSERT INTO `sys_user` VALUES ('kevin', '6998');
INSERT INTO `sys_user` VALUES ('roy', '3525');

INSERT INTO `sys_role` VALUES ('ROLE_ADMIN', '管理角色');
INSERT INTO `sys_role` VALUES ('ROLE_OTHER', '其他角色');
INSERT INTO `sys_role` VALUES ('ROLE_USER', '用户角色');

INSERT INTO `sys_user_role` VALUES ('1', 'admin', 'ROLE_ADMIN');
INSERT INTO `sys_user_role` VALUES ('2', 'admin', 'ROLE_USER');
INSERT INTO `sys_user_role` VALUES ('3', 'kevin', 'ROLE_USER');
INSERT INTO `sys_user_role` VALUES ('4', 'roy', 'ROLE_OTHER');
12.2.5.2 创建实体类
根据数据库设计,创建3个实体类,供后续MyBatis输出据库操作用。
创建SysUser实体类(对应sys_user表)。
package com.example.security.db.entity;

public class SysUser {

    private String username;
    private String password;

    public String getUsername() {
        return username;
    }
    public void setUsername(String username) {
        this.username = username;
    }
    public String getPassword() {
        return password;
    }
    public void setPassword(String password) {
        this.password = password;
    }

}
创建SysRole实体类(对应sys_role表)。
package com.example.security.db.entity;

public class SysRole {

    private String roleCode;
    private String roleName;

    public String getRoleCode() {
        return roleCode;
    }
    public void setRoleCode(String roleCode) {
        this.roleCode = roleCode;
    }
    public String getRoleName() {
        return roleName;
    }
    public void setRoleName(String roleName) {
        this.roleName = roleName;
    }

}
创建SysUserRole实体类(对应sys_user_role表)。
package com.example.security.db.entity;

public class SysUserRole {

    private String id;
    private String username;
    private String roleCode;

    public String getId() {
        return id;
    }
    public void setId(String id) {
        this.id = id;
    }
    public String getUsername() {
        return username;
    }
    public void setUsername(String username) {
        this.username = username;
    }
    public String getRoleCode() {
        return roleCode;
    }
    public void setRoleCode(String roleCode) {
        this.roleCode = roleCode;
    }

}
12.2.5.3 创建DAO
最简起见,我们创建SysUser和SysUserRole对应的DAO(mapper)。
SysUser的mapper.xml:
<?xml version="1.0" encoding="UTF-8"?>
<!DOCTYPE mapper PUBLIC "-//mybatis.org//DTD Mapper 3.0//EN" "http://mybatis.org/dtd/mybatis-3-mapper.dtd">
<mapper namespace="com.example.security.db.mapper.SysUserMapper">

    <select id="selectSysUser" resultType="SysUser">
        select * from sys_user where username = #{username}
    </select>

</mapper>
SysUser的Mapper:
package com.example.security.db.mapper;

import org.springframework.stereotype.Repository;

import com.example.security.db.entity.SysUser;

@Repository
public interface SysUserMapper {

    SysUser selectSysUser(String username);

}
SysUserRole的mapper.xml:
<?xml version="1.0" encoding="UTF-8"?>
<!DOCTYPE mapper PUBLIC "-//mybatis.org//DTD Mapper 3.0//EN" "http://mybatis.org/dtd/mybatis-3-mapper.dtd">
<mapper namespace="com.example.security.db.mapper.SysUserRoleMapper">

    <select id="selectSysUserRole" resultType="SysUserRole">
        select * from sys_user_role where username = #{username}
    </select>

</mapper>
SysUserRole的Mapper:
package com.example.security.db.mapper;

import java.util.List;

import org.springframework.stereotype.Repository;

import com.example.security.db.entity.SysUserRole;

@Repository
public interface SysUserRoleMapper {

    List<SysUserRole> selectSysUserRole(String username);

}
以上两个mapper,完成用户的用户角色关系这两张表的访问。
12.2.5.4 创建CustomUserService
CustomUserService实现org.springframework.security.core.userdetails.UserDetailsService接口,完成用户及用户所拥有的角色信息从数据库中获取的功能。
创建CustomUserService类:
package com.example.security.db.service;

import java.util.ArrayList;
import java.util.List;

import org.springframework.beans.factory.annotation.Autowired;
import org.springframework.security.core.authority.SimpleGrantedAuthority;
import org.springframework.security.core.userdetails.User;
import org.springframework.security.core.userdetails.UserDetails;
import org.springframework.security.core.userdetails.UserDetailsService;
import org.springframework.security.core.userdetails.UsernameNotFoundException;

import com.example.security.db.entity.SysUser;
import com.example.security.db.entity.SysUserRole;
import com.example.security.db.mapper.SysUserMapper;
import com.example.security.db.mapper.SysUserRoleMapper;

public class CustomUserService implements UserDetailsService {
    @Autowired
    SysUserMapper sysUserMapper;
    @Autowired
    SysUserRoleMapper sysUserRoleMapper;

    @Override
    public UserDetails loadUserByUsername(String username) throws UsernameNotFoundException {
        SysUser sysUser = sysUserMapper.selectSysUser(username);
        String password = sysUser.getPassword();
        List<SysUserRole> sysUserRoles = sysUserRoleMapper.selectSysUserRole(username);
        List<SimpleGrantedAuthority> authorities = new ArrayList<>();
        for (SysUserRole sysUserRole : sysUserRoles) {
            authorities.add(new SimpleGrantedAuthority(sysUserRole.getRoleCode()));
        }

        return new User(username, password, authorities);
    }

}
12.2.5.5 创建Controller
按照上一小节创建页面访问的控制器PagesController:
package com.example.security.db.controller;

import org.springframework.stereotype.Controller;
import org.springframework.web.bind.annotation.RequestMapping;
import org.springframework.web.bind.annotation.RequestMethod;
import org.springframework.web.servlet.ModelAndView;

@Controller
public class PagesController {

    @RequestMapping("/index")
    public String index() {
        return "/index";
    }

    @RequestMapping(value = "/login", method = RequestMethod.GET)
    public String login() {
        return "/login";
    }

    @RequestMapping("/admin/hello")
    public ModelAndView adminHello() {
        ModelAndView mv = new ModelAndView();
        mv.addObject("user", "admin");
        mv.setViewName("/admin/hello");
        return mv;
    }

    @RequestMapping("/user/hello")
    public ModelAndView userHello() {
        ModelAndView mv = new ModelAndView();
        mv.addObject("user", "kevin");
        mv.setViewName("/user/hello");
        return mv;
    }

    @RequestMapping("/other/hello")
    public ModelAndView otherHello() {
        ModelAndView mv = new ModelAndView();
        mv.addObject("user", "other");
        mv.setViewName("/other/hello");
        return mv;
    }

}
12.2.5.6 Thymeleaf页面
复用上一小节(12.2.4)中的Thymeleaf页面。
12.2.5.7 Spring Security配置
创建配置类SecurityConfiguration,其中关键的一句代码(将数据库访问用户信息的CustomUserService类注入)是auth.userDetailsService(customUserService());
package com.example.security.db.config;

import org.springframework.context.annotation.Bean;
import org.springframework.context.annotation.Configuration;
import org.springframework.security.config.annotation.authentication.builders.AuthenticationManagerBuilder;
import org.springframework.security.config.annotation.web.builders.HttpSecurity;
import org.springframework.security.config.annotation.web.builders.WebSecurity;
import org.springframework.security.config.annotation.web.configuration.EnableWebSecurity;
import org.springframework.security.config.annotation.web.configuration.WebSecurityConfigurerAdapter;
import org.springframework.security.core.userdetails.UserDetailsService;
import org.springframework.security.crypto.bcrypt.BCryptPasswordEncoder;
import org.springframework.security.crypto.password.NoOpPasswordEncoder;
import org.springframework.security.crypto.password.PasswordEncoder;

import com.example.security.db.service.CustomUserService;

@Configuration
@EnableWebSecurity
public class SecurityConfiguration extends WebSecurityConfigurerAdapter {

    @Bean
    PasswordEncoder passwordEncoder() {
        return NoOpPasswordEncoder.getInstance();
    }

    @Bean
    UserDetailsService customUserService(){
        return new CustomUserService();
    }

    @Override
    protected void configure(AuthenticationManagerBuilder auth) throws Exception {
        auth.userDetailsService(customUserService());
    }

    @Override
    protected void configure(HttpSecurity http) throws Exception {
        http.formLogin()
            .loginPage("/login")
            .usernameParameter("login_username")
            .passwordParameter("login_password")
            .failureUrl("/login?error")
            .defaultSuccessUrl("/index")
            .permitAll()
        .and().logout()
            .logoutUrl("/logout")
            .logoutSuccessUrl("/login?logout")
            .clearAuthentication(true)
            .invalidateHttpSession(true)
            .permitAll()
        .and().authorizeRequests()
            .antMatchers("/admin/**").hasRole("ADMIN")
            .antMatchers("/user/**").hasRole("USER")
            .anyRequest()
            .authenticated();
    }

    @Override
    public void configure(WebSecurity web) {
        web.ignoring().antMatchers("/config/**", "/css/**", "/images/**", "/js/**");
    }

}
在学习过程中为了方便往数据库中录入用户密码信息(明文),所以上面的配置中使用了NoOpPasswordEncoder这个奇葩的密码编码器,一如既往地强调:严禁在非学习系统中使用这个(明文的)密码编码器。
Spring Security配置中使用角色默认前缀为“ROLE_”,例如使用角色“ADMIN”,在数据库表中应该存储为“ROLE_ADMIN”。参考
org.springframework.security.access.vote.RoleVoter类中的rolePrefix属性。
12.2.5.8 启动类
启动类中别忘了MyBatis的@MapperScan注解。
package com.example.security.db;

import org.mybatis.spring.annotation.MapperScan;
import org.springframework.boot.SpringApplication;
import org.springframework.boot.autoconfigure.SpringBootApplication;

@SpringBootApplication
@MapperScan("com.example.security.db.mapper")
public class SpringBootSecurityDbApplication {

    public static void main(String[] args) {
        SpringApplication.run(SpringBootSecurityDbApplication.class, args);
    }

}
12.2.5.9 测试
启动项目测试,和上一小节(12.2.4)效果一致。
本小节示例项目代码:
https://github.com/gyzhang/SpringBootCourseCode/tree/master/spring-boot-security-db